The Most Comprehensive Record Cleaning Article Ever!
I use Disc Doctor fluid and applicator pads and have incorporated them into the regimen outlined by Michael Wayne in this story. Disc Doctor must be used in conjunction with a final distilled water wash and dry.
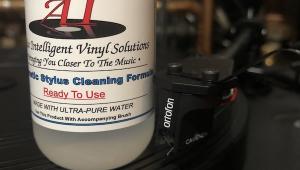
There are other fluids on the market worth considering, including Audio Intelligent, (an advertiser on the website) and L'Art Du Son (available from themusic.com). Whichever fluid you use, consider the manufacturer's recommended application procedure, read Mr. Wayne's article and use both to come up with a procedure that works for you.
Also note that the once discontinued Orbitrac is again in production.
Zen and the Art of Record Cleaning Made Difficult
By Michael Wayne
You've finally secured a copy of that elusive Golden Era record you've sought for so long. It cost you more than a set of tires for a Porsche 959. Now you are ready to reap the rewards of your unrelenting efforts; but first, since you consider yourself a well informed audiophile record collector, you decide to vacuum wash your treasured disc, both to make certain you hear nothing but its unvitiated analog beauty, and because you vaguely recall reading something somewhere about the potential record damaging dangers of playing uncleaned records.
Dutifully you apply your favorite fluid to the disc'perhaps using a brush to scrub and spread the fluid about. You set the machine to vacuum, and in a mere few revolutions, you are at last ready to revel in the sonic ecstasy of your new vinyl treasure.
By the end of side one, a slight but persistent vinyl noise and a subtly cloudy musical presentation fill you with doubt and nascent frustration. Vinyl angst has set in. Wasn't this LP supposed to be 'Super-mint,' or 'AAA-Ultra-Plus'' or some such hyperbole? It was certainly expensive enough. Burned again? Perhaps another cleaning cycle might do the trick.
Doggedly, you repeat the ritual, and this time you are reassured. Why yes, more of that whooshy background is gone, and darn if the entire soundstage hasn't increased in scope and definition. The instruments sound richer and timbrally more accurate. Ah! Your troubled soul begins to relax. Another few cleanings and perhaps even that thin hiss which has new replaced the intial whoosh will disappear; the soundstage and hall reverb will become even more evident and pure. This disc may yet sound the way your dealer 'Sid the Groovemeister' promised it would.
Keep dreaming, Alice. Wonderland ever beckons the desperate. Your fastidious but flawed, and woefully incomplete cleaning attempts may have insured that you never experience the full potential of your cherished record. You may as well go digital.
Indeed, the very first alarm signaling a potentially serious record cleaning problem sounds simultaneously with improvements heard after the first cleaning cycle. It indicates that the cleansing attempt was only partially successful.
In place of the large, original groove contaminants, there now are smaller, possibly stickier ones, to which cleaning fluid has bonded chemically and, if the record is played after this single cleaning cycle, probably thermodynamically as well, due to the intense heat and pressure generated by the stylus traveling through the groove.
Play a record with foreign matter sticking to its grooves, and you run the risk of welding it in permanently. The solution, of course, is to start with a completely and perfectly clean disc.
Let's examine a few widely held misconceptions about record cleaning. The first is that vacuum cleaning is sufficient and complete. In fact, it may be, but only in those few special cases where the contaminants are primarily dust and nothing more. When a disc has been subjected to an environment of tobacco smoke, fingerprint oils (which over time tend to harden and solidify on a vinyl surface), silicone record cleaning cloths (true groove polluting monsters), God knows-what cleaning fluids and brushes, and a variety of other sticky, gummy substances, a simply vacuum cleaning cycle is unlikely to do the trick.
Using the techniques described in this article, I have regularly taken vacuumed discs and removed globs of yellow-brownish gooey substances from the supposedly 'clean' record grooves.
The safe and highly effective cleaning techniques described here, do require some time and effort, but since when has that stopped analogue devotees? The cleaning approach I recommend is based upon the following principles and strategies:
1) Use of a chemically wide spectrum of cleaning fluids.
No single fluid is completely effective in removing all possible types of disc contaminants. To insure effective cleaning, several fluids must be used. Whatever one fluid cannot clean well, another fluid must be used which can.
As Myles Astor has demonstrated (in his article 'Record Cleaning Fluids,' Sounds Like #8, May 1990. This is the finest article to date on the subject of record cleaning fluid chemistry and its sonic consequences), groove wall interactions occur on a molecular level, and like it or not, any and every cleaning fluid will leave some amount of itself behind. In order to keep residues to a minimum, the cleaning solution used in each step must dissolve the one used previously. This minimizes or prevents audible cleaning fluid residue signatures such as low level 'whoosh' and high pitched hiss.
2) Minimal contamination of final brushes.
The surface of the vacuum cleaning brush should only come into contact with a purely clean disc surface, otherwise it will transfer contaminants from record to record, absorbing and smearing more and more goo as it goes. To accomplish this, prior to disc vacuuming we must use a fluid application/absorption/groove scrubbing device, with replaceable and disposable pads. In this regimen, vacuum cleaning is the last step, the purpose of which is to remove fluids rather than gross contaminants and debris from the record surface. This insures that the vacuum suction pads will not spread dirt from disc to disc.
TOOLS, SUPPLIES AND PREPARATION
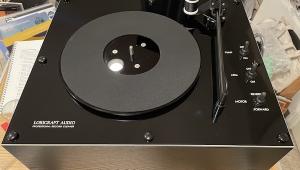
You will need several inexpensive items, the first of which is a used turntable. It need not be operational, but it will ease your task greatly if it is'a high torque model being preferable. Your only concern is a platform that rotates, or may be easily rotated. I found an old Pioneer PL-35 belt drive for ten bucks. Its moderate torque drive works very well in this application. Do not use your primary turntable for these procedures, due to the stress and wear which will be exerted on the main bearing and suspension.
You'll also need two record mats. Wash one with dishwashing liquid, rinse, then rinse again with any alcohol based record cleaning solution (or use a diluted alcohol solution). You want to remove all residues from this mat. Then dry it carefully. This will be your clean mat; it must come into contact with only the cleaned side of a record. Keep your fingers off of the record supporting surface. The second mat will be used only under the uncleaned side of a record.
Step 1 in this cleaning procedure requires sterile cotton pads. I use quilted cotton squares sold for use with infants and for cosmetics application. You can use plain cotton wadding sold in drug stores but it is trickier to handle and more expensive.
Buy a number of small nylon bristle brushes, which will be used to clean the various record brushes used throughout the procedure. I use fingernail brushes, but any small brush with a handle, which keeps your fingers from touching the bristles will do. You'll also need a small, clean bowl in which to soak the brushes. First wash the bristle brushes, as you washed the clean record mat, but be sure not to scrub them with your hands; instead, use another brush and rub them together.
Pour some undiluted isopropyl alcohol into the bowl and soak the brushes for about 15 minutes. Since you'll be making frequent use of these bristle-brushes to wipe your record brushes clean, you want to make sure they carry no lubricants and/or contaminants which could be transferred from brush to brush and onto the record surface.
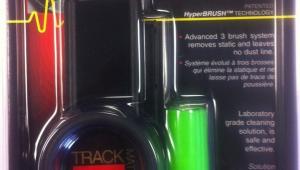
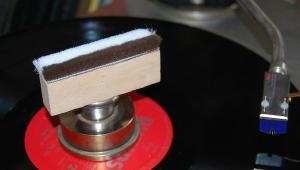
You'll be using several record cleaning hand brushes. The first can be any sort of dust grabbing felt or carbon fiber brush, such as an old Discwasher, Parastat, etc. It will be used only for top layer dust removal of an uncleaned disc surface. Never use it on a cleaned disc. The other brushes you'll need are two Allsop Orbitracs (the Orbitrac was out of production when this piece originally ran, but is now again in production, in part due to my lobbying and agitation. However, it now uses easily replaceable cartridges, so one Orbitrac will do, but be sure to use different cartridges for the two steps in Wayne's piece'MF).
This is the most effective record groove scrubbing device I have tested to date, and it is crucial to successfully accomplishing the procedure described here.
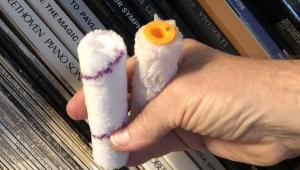
The key to the Orbitrac's superb effectiveness is its pads which change from pure white to sickly yellow as they absorb groove contaminants. The Orbitrac's pads are replaceable. Other hand brushes are nothing more than highly effective grease applicators, spreading unwanted substances from one disc to the next.
Obtain several handsized spray bottles'preferably chemistry lab grade glass bottles'if you can find them. Glass is basically inert and will not react with the various solutions we'll be using. I have also used plastic bottles with no problems. Be sure to rinse the interior of each spray bottle'including the intake stem'several times with isopropyl alcohol, finishing with Nitty-Gritty First solution.
Since the cleaning solutions which end up on your records will come from these bottles, be very certain that they are contaminant free.
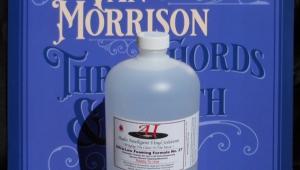
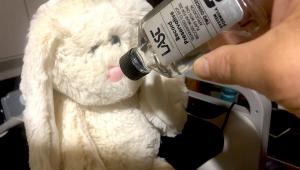
Once these atomizer bottles are clean and dry, fill one with Nitty Gritty First fluid, then quickly cap the original supply bottle and apply tape around the cap seam to help prevent evaporation. This is the solution to be used in step 1. Forr step 2 you may use any record cleaning solution you wish as long as it is not the same as the solution you apply when vacuuming your discs (principle 1).
I prefer alcohol bearing fluids since they are the most effective in cleaning raw, dirty records. The solution I use for step 2 consists of 80% VPI Record Cleaning Fluid and 20% of the purest alcohol I can obtain. I advise against using drug store grade 91% isopropyl alcohol as I have found that it leaves a substantial residue.
If you can't obtain chemically pure alcohol (99% or better), you may safely use a grain alcohol such as Everclear (94%), which is sold in liquor stores to those harty (or foolish) enough to use it for other than practical applications. Do not use vodka.
THE PROCESS
Step 1
The first step is of key importance. If carried out effectively, the entire process will be more successful. Begin by removing the loose dust on the record surface with your felt brush (Discwasher etc.). You simply want to wipe off some surface dust. Be sure to place your 'dirty' record mat'not the clean mat'on your cleaning turntable.
Next, spray some First fluid on some cotton wadding. If using quilted cotton squares (preferred), make a three layer pad, being careful not to touch the surface, which will come into contact with the disc.
As the record rotates, spray First directly on the lead-in groove area of the record's surface, while holding the pad against the same section. Since this maneuver requires some experience to perfect, you might want to practice on a few reject LPs.
Never touch the part of the cotton pad or wadding which comes into contact with the record surface. The aim here is to remove contaminants, not to reapply them. Also, never use the part of the cotton wad you grip as a cleaning surface.
The appropriately named Nitty-Gritty First solution is the most effective solvent I have ever tested for initial loosening of oily, gummy, contaminants such as tobacco tar, silicone cloth goop, hand oils, and the like. It also effectively removes used record store price stickers from album jackets, and the glue sometimes left behind if you do manage to peel them off.
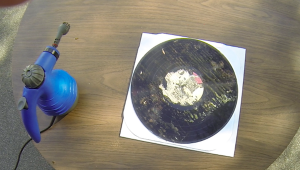
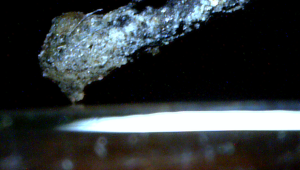
After several revolutions you'll have a good idea of how clean or dirty the disc really is. Dirty discs of the tobacco/hand oil/silicone/unknown-substance-from-Mars variety will leave a yellow-brownish (or sometimes grey-blackish) band smeared across your cotton pad.
If your previously vacuumed disc reveals this kind of filth, you will instantly know the error of your ways. Clean the outer section again, using either a clean, untouched portion of your cotton pad, or a fresh one. Continue until further passes no longer deposit any filth on the pad.
Once you have satisfactorily cleaned the outer edge, repeat the process in sections, moving inward to the center of the disc. Be careful no to touch the contact surface of the cotton pad, and use a fresh one whenever it begins to show even a faint yellow stain. Don't cheap out here.
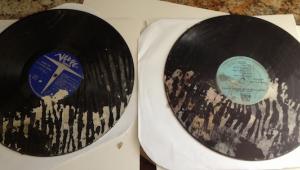
You will find that the record's filthiest portions'often by a wide margin'are the outer and inner areas. Avoid getting any cleaning fluid on the record label, which is liable to bleach and turn white.
Having finished applying and wiping an entire record side with moderate to large amounts of First, you may notice some wet spots. Allow them to evaporate dry. This is the only fluid with which you may do this. NEVER ALLOW ANY OTHER FLUIDS TO EVAPORATE DRY ON A DISC SURFACE. All fluids must either be absorbed, vacuumed, or diluted by other fluids lest they leave a groove fouling residue. Letting First evaporate actually increases its effectiveness since the remaining residue continues to loosen foreign contaminants from the groove walls.
Step 2
Here we'll wash away First residue, microscopic particulate matter, and any remaining substances not loosened by step one. We'll also effectively but gently scrub the vinyl, cleaning down to the groove bottom'something plain vacuuming does not accomplish.
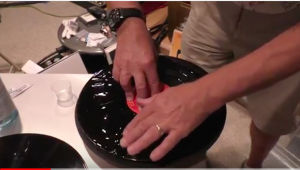
We'll do this using the Orbitrac. But first you must brush the surface of a virgin Orbitrac pad with one of the previously mentioned hand brushes, in order to remove lint and any other large particles possibly trapped in the pad filaments. Brush carefully: a hard particle trapped in an Orbitrac pad can scratch a disc surface.
We will be using two Orbitracs: one for cleaning, the other for mopping and drying. After you've brushed the Orbitrac pad, spray it wi some of the alcohol based fluid you've previously prepared. Use enough to make it wet, but not saturated to the point where it drips.
Turn off the turntable. Take a small portion of cotton wadding (or wear a loose, clean plastic glove) and use it to apply enough pressure against the record edge to hold it stationary. Don't let your bare finger touch the record itself.
Following the simple directions which come with the Orbitrac, rotate it over the record using your free hand. After several revolutions, stop and examine the Orbitrac's pad. If only the faintest signs of yellow show, quickly take a second bristle brush and vigorously brush the pad surface.
Reapply the alcohol-based fluid to the Orbitrac and repeat the above.
If, on the other hand, your initial pad examination turns up clearly yellow or yellow-brownish (or worse) stains, that is an indication that you have not successfully carried out step one: your disc is still filthy and will foul every brush surface with which it comes into contact'including your vacuum suction brush. Repeat Step one'or switch to CDs. When you return to Step 2 be sure to start with a fresh Orbitrac pad.
When your Orbitrac-ing leaves no yellow on the pad, use the second Orbitrac to dry the disc. Start with a dry pad and don't worry if the disc is not bone dry when you're done. Wipe the wet-cleaning Orbitrac pad with one of the bristle brushes, spray some fluid on the Orbitrac pad and repeat the wet cleaning followed by the dry one.
Next, we'll vacuum (at last!). The purpose of the drying Orbitrac is to remove any gross contaminants from the record. The vacuum's only purpose is to remove minute levels of fluid residue, which is all that should remain once you've completed step one's top-of-the groove wall pre-cleaning and step two's deep-groove-wall Orbitrac cleaning.
Step 3
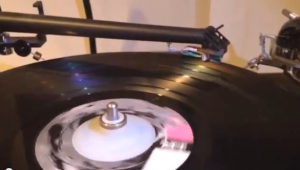
Simply apply your fluid of choice and vacuum. I prefer to evenly spread a large quantity of VPI record cleaning fluid across the disc using a non-abrasive felt applicator like the one Audio Advisor supplies with the Nitty Gritty vacuum machines. Stiffer brushes'the ones VPI packs with its machines'are also effective.
A large quantity of fluid insures both complete groove penetration and the removal of anything remaining in the grooves. Extra fluid also requires longer vacuuming time, which also increases the chances of getting everything sucked out of the grooves.
Observe the disc being vacuumed under good lightning: you'll find that thorough fluid removal requires more revolutions than you probably thought necessary. What appear to be groove modulations may actually be residual fluid wedged into tiny crevices. Remember, any fluid not sucked from the grooves may obscure low level resolution and inner detail or result in audible noise. Once the record is dry, re-apply fluid and vacuum a second time.
When you repeat step 1 to clean the opposite side of the disc, be sure to use the clean record mat under the just-cleaned side of the record. If you own a VPI cleaning machine, be sure to place the clean mat under the just cleaned side when you vacuum. Use the clean mat for all subsequent vacuum cleanings of records you have washed using this regimen.
FINAL TIPS
There is one additional step you can take to make this cleaning regimen even more effective. Obtain a supply of triple distilled water (Triple distilled water, available at some pharmacies, is not easy to come by: when I tried to obtain some in NYC, the pharmacist accused me of being either an abortionist or an intravenous drug user. In fact, it requires a doctor's prescription in New York. Perhaps it is easier to obtain where you live, either at a pharmacy, or a chemical supply house. You could use plain distilled water, but be careful: if it hasn't been properly manufactured, you could leave a residue of noise, depositing minerals in the grooves, thus defeating the entire purpose of this complex, time consuming procedure'MF). Use it between each step described above, to purge or effectively dilute all chemical residues remaining in the grooves. So, after performing step 1, repeat with triple distilled water using cotton wadding or pads. After performing step 2, follow up with triple distilled water. After your first vacuuming, do likewise.
Now that you have a really clean record, it makes no sense to return it to its original smelly, oily, decades old vinyl-leaching inner sleeve. Use a fresh, new sleeve (I like rice paper ones'MF). You can also clean disc covers quite effectively using Formula 409 and plain old paper towels. Avoid using Fantastic, which contains a powerful pine perfume that seems to stick to album covers forever. 409 will remove the aged, mildew-moss appearing wear, as well as a good deal of ring wear. Try it. Be sure to allow the cover to dry thoroughly before replacing it on your shelf or the residual moisture may grow mildew.
When your cleaning session is over, take yet another bristle brush and wipe your final fluid applicator so it dries quickly. Run the vacuum to allow the suction nozzle and its pads to dry. If you own a manual machine such as a Record Doctor, gently brush the suction pads to and fro as you run the vacuum.
While the entire process described herein may seem hopelessly complex, in practice it is logical and straightforward, albeit time consuming. Do no take short cuts: they will lessen the effectiveness of the procedure and may lead to the contamination of record cleaning pads and the soiling of all subsequent discs which come into contact with them. Unless the record is very clean to begin with, follow the entire procedure or don't bother at all. Follow these instructions carefully and you're sure to be pleased with the results.


| Equipment Reviews | The Gruvy Awards | Blogs Analog Tips | Columns Music | Show Reports | News Resources |
 © 2026 AnalogPlanet
AVTech Media Americas Inc.
All rights reserved