Simon Yorke Designs Series 9 turntable & tonearm Page 2
Setup
Despite what Yorke's perfunctory instructions would have you believe, adjusting the S9's tonearm can be tricky even for an experienced analog devotee (see below). Otherwise, setting up the S9 was fast and simple, especially as the arm-pivot assembly comes already mounted on the armboard, which is also attached to the plinth. Still, my experience in setting up the S7 helped more than it should have—Yorke's instructions for setting up the S9 include no illustrations. [This unit was shipped without the usual detailed instructions.—Ed.] No pictures had accompanied the original S7 instructions either, until I bitched about it in my review, so here goes again: Simon, without visual aids, setting up the S9 is not as simple as you might think.

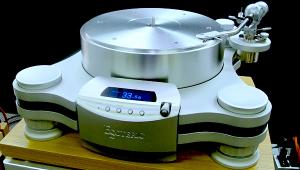
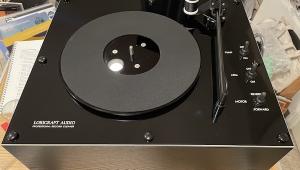
Place the plinth on your chosen level platform (the S9 offers no level adjustment of its own), with the Yorke logo facing forward, which places the arm pivot at about 2 o'clock. Remove the rubber stopper from the bearing opening and inject 1ml of light-viscosity sewing-machine oil into the well, then insert the bearing shaft in the hole and press down gently on it until it bottoms out—easier said than done, due to the tight shaft/bearing clearance—or carefully place the platter atop the bearing and let gravity do the work. Be sure to wipe away any excess oil that might seep from the well so that the armboard isn't contaminated. And be sure there's enough oil in the shaft to prevent scoring of the shaft and sleeve. It's better to add a bit too much, then wipe away the excess, than to run the top of the shaft dry.
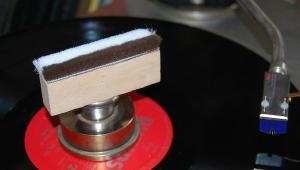
Although it's perfectly strong and durable once set in place, the graphite mat is brittle and easily broken, so take care in placing it atop the platter. Next, gently lower the tonearm assembly onto the pivot point, ensuring that the U-shaped bracket properly caresses its Teflon mate. Dress the rear terminating wires carefully through the hole in the RCA jacks' mounting plate and attach them to the pins. Yorke identifies these wires with nonstandard colors, so be sure to follow the instructions!
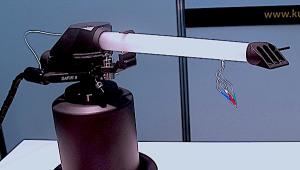
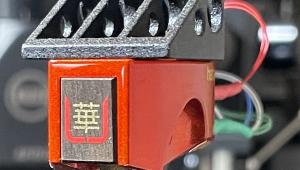
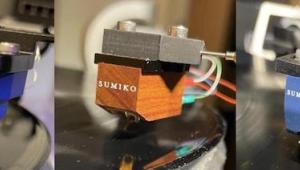
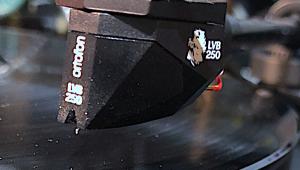
Installing a cartridge in the S9's headshell-less tonearm requires that you pre-assemble the two-disc sandwich (being careful to align the bolt holes so the offset angle points in, not out!), then attach the cartridge to it using the long bolts.You carefully slide the assembly onto the end of the armtube, pushing it back to approximately where you think it should end up, then screw in the two bolts to secure that position, being sure to approximate the correct azimuth (with the disc sandwich parallel to the record surface). This process takes a bit of getting used to; there will be some fumbling until you get the hang of it. Attach the clips to the cartridge.
Speaking of hang, Yorke neglects to tell you to hang one of the two weights onto the counterweight shaft after you've slid the cartridge assembly onto the armtube. Try the 50gm weight first, near the pivot point, and lock it down with the grub screw. In case the counterweight is too heavy to balance your chosen cartridge, to prevent the arm from flipping up into the air, secure it with one hand (there's no arm lock) and, with the other, carefully remove the stylus protector and switch to the 35gm weight. Otherwise, back off the counterweight (if needed), finger-feel the VTF to make sure it's not excessive, then use an external stylus gauge to set VTF to the midpoint of the cartridge's recommended range. (If you've read some blowhard reviewer's suggestion that a given cartridge sounds better when tracking at more than 1gm over the top of the recommended range, ignore him.) The sliding counterweight makes it difficult to calibrate small changes in VTF, so take your time.
Once you've set VTF, see if the VTA is grossly off (ie, armtube far from parallel to the record surface). If it is, replace the stylus guard and carefully loosen the shaft-locking grub screw while holding the pivot assembly to prevent it from dropping and crashing to the armboard collar, which it otherwise will. Carefully approximate parallelism with the platter and lock the grub screw without overtightening it. As with other arms featuring unlock-and-drop adjustability of VTA, making small adjustments of VTA is nearly impossible with the S9—as is returning to the original VTA setting, unless you mark the shaft before loosening the screw. VTA fetishists will not be happy.
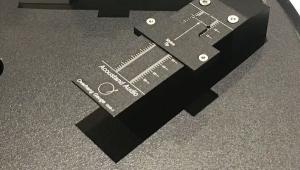
Remove the stylus guard. Using the supplied protractor, set the overhang and zenith angle. Remember that when you move the "headshell" assembly (which you almost certainly will), you'll be changing the VTF. If you move it forward more than a few millimeters, be sure to recheck and adjust. While setting overhang is obviously easy, the fixed bolt holes make setting the zenith angle (to ensure the cantilever's tangency to the groove at the protractor null points) somewhat problematic. Though the S9's cartridge mounting doesn't provide much play compared to slotted-headshell designs, I found it to be sufficient. However, adjustment requires loosening both bolts; if you're not careful, you'll upset your hard-won overhang adjustment.
Yorke advises setting the azimuth (ie, the cartridge cantilever's perpendicularity to the groove) at the same time you set the overhang, by making sure the cartridge body is parallel to the record surface. That, of course, will only give an approximation as it assumes the motor geometry is parallel to the body; if you want to dial in azimuth properly—and you should—use a voltmeter and follow the instructions on my 21st-Century Vinyl turntable-setup DVD, available from the e-commerce page at www.stereophile.com. Unfortunately, adjusting azimuth requires you to once again loosen the long bolts, and thus run the risk of throwing off both the overhang and the zenith angle as you lock in the azimuth setting.
|
| ||||||||||


| Equipment Reviews | The Gruvy Awards | Blogs Analog Tips | Columns Music | Show Reports | News Resources |
 © 2026 AnalogPlanet
AVTech Media Americas Inc.
All rights reserved